Tackling Tough Terrain
BRING A FRIEND: NEVER DRIVE ALONE. If you get stuck in a sticky situation, who will be there to help? Always use the buddy system – or at the very least, let someone know where you are at and what time you expect to be back.
Be equipped to handle the specific terrain you’ll encounter.
KNOW WHAT YOU’RE UP AGAINST
Let’s be real – you started off-roading for a reason. You wanted to explore new places, take the path of most resistance and conquer challenges that most of your friends wouldn’t even dream of. But with all that reward comes a great deal of risk.
Off-road trails will be unpredictable, terrain will vary and conditions can change in the blink of an eye. Before you head off the beaten path, make sure you and your vehicle are equipped to handle the specific terrain you’ll encounter. Even though driving surfaces will vary, your pretrail approach should always remain the same.
ENVIRONMENTAL CONSIDERATIONS
Before embarking on your next off-road adventure, it never hurts to remind yourself about the importance of low-impact travel. We know you’ve heard it before, but you’re about to hear it again: pack it in; pack it out. We only have one Earth, so you better treat it right.
Plan ahead and know what type of terrain you’ll encounter to minimize the impact of unneeded trail damage.
Always stick to established routes.
Take all trash and rubbish home with you.
Dig a hole 6 to 8 inches deep when disposing of human waste.
Minimize the impact of your campfires by adhering to all fire restrictions.
Respect private property.
BFGoodrich® Tires supports many groups dedicated to keeping off-roading safe and sustainable to the environment, including TREAD LIGHTY! This not-for-profit group is dedicated to enhancing recreational access and opportunities by promoting outdoor ethics. Learn more at treadlightly.org.
TREAD LIGHTLY’S CORE VALUES
TRAVEL RESPONSIBLY
RESPECT THE RIGHTS OF OTHERS EDUCATE YOURSELF
AVOID SENSITIVE AREAS
DO YOUR PART
TRAIL RATINGS
All trails vary in difficulty. Much of the public’s perception of difficulty can be attributed to individual experience level. Inexperienced drivers may attempt to fight above their weight class and end up causing unnecessary damage to their vehicles. Be realistic about what you and your vehicle are capable of handling. Remember, the weather can have an impact on the condition of a trail and may cause a normally mild trail to become much more challenging.
Many trails are assigned a rating based on their level of difficulty. To help drivers choose the right trail for their abilities, Jeep Jamboree USA provides many trails with a number and colored shape to indicate how challenging they’re likely to be.
| TRAIL RATING | DESCRIPTION | |
|---|---|---|
| 1 – 2 | EASY. A great option for beginners. Weather permitting, these trails are relatively easy for most drivers and vehicles to navigate. Continued use of 4WD may not be required. You’re likely to encounter dirt, mud and rocks. | |
| 3 – 5 | MODERATELY DEMANDING, especially for drivers without much off-road experience. 4WD with 4-LO is required because you’re likely to encounter challenging obstacles such as boulders, mud holes and streams. | |
| 6 – 7 | DEMANDING. A challenge for most skill levels. 4WD with 4WD Low is a must. You’re likely to face steep climbs, deep mud and large boulders. Do not navigate these trails alone. | |
| 8 – 9 | HIGHLY DEMANDING. These trails are reserved for skilled off-road drivers. Lift kits and lockers are extremely beneficial. There’s a good chance your vehicle will get stuck. 4WD with 4WD Low is absolutely necessary. Mud holes are likely to be quite deep, and rock climbing is challenging. | |
| 10 | EXPERTS ONLY. You’re going to get stuck, but isn’t that the point? This trail rating is reserved for the toughest off-road trails open to the public. Put your vehicle in 4WD Low before you even start. Good luck! |
Source: JeepJamboreeUSA.com
HILLS
Extreme trail riding is known for deep mud pits and large boulders. But hills can be even more daunting than you expect when first tackling a trail.
Be realistic. If you don’t feel confident that you and your vehicle can make it up the hill, then don’t try. Take it easy and just do what you can to keep the shiny side up and the rubber side down.
PREPARING FOR THE ASCENT
Make sure to scout the hill’s crest by foot so you know exactly what’s on the other side.
Lock your differentials. You’ll need all the traction you can get.
Use the short run up to the slope as an opportunity to gain extra momentum that may be needed to clear the hill.
GOING UP SHIFT UP
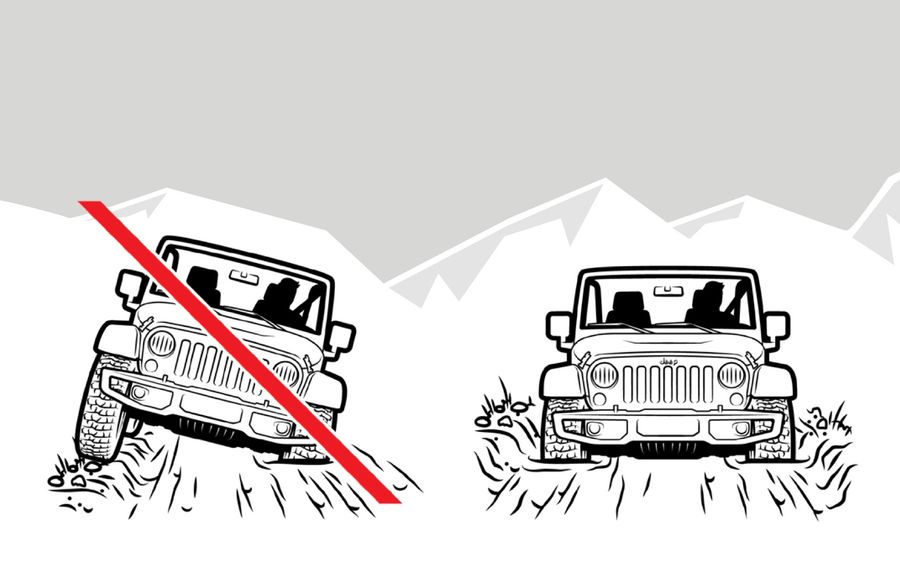
1. Point your vehicle straight up the hill.
Take the most direct route up.
2. Keep a constant, steady acceleration.
Choose the highest gear possible to generate the most torque without losing traction.
3. If your vehicle stalls, put it in reverse and back straight down the hill.
Never try to turn around on a hill; it increases the likelihood of your vehicle rolling. If you have a manual, see how to start from a stall.
4. Slow or stop at the top.
Ease up on the accelerator as you approach the crest of a hill to avoid launching your vehicle into orbit. But make sure you still have enough momentum to reach the top. At the top of the hill, come to a full stop so you can evaluate the descent.
GOING DOWN SHIFT DOWN
5. Point your vehicle straight down the hill.
6. Maintain a slow, controlled speed.
7. Let the engine do most of the braking.
Choose the lowest gear possible in both the transmission and the transfer case.
8. With an automatic transmission, feather the brake to control the descent.
Engine braking may be limited.
9. With a manual transmission, avoid depressing the clutch.
Keep your left foot on the floorboard to avoid the clutch all together. Engine braking doesn’t work when out of gear.
10. If you start to slide
Turn into the slide as you would on snow or ice. If counter steering is not enough, apply a little throttle to help straighten out the vehicle.
Pro
Tip
Here’s your chance to take what you’ve learned about your vehicle’s clearance angles. Survey the hill ahead. Will your nose hit first? If so, approach it like you would an obstacle, at an angle, one tire, then the other. Once up on the hill, adjust to go straight up the ascent.
SCOUT THE TERRAIN This won’t eliminate all surprises, but it will give you a better idea of what you’re up against.
ROCKS
Rock beats scissors for a reason. It’s one of the most unforgiving terrains you’re likely to encounter on the trail, which is why it requires great caution.
Most rock crawling is done in low gear at a snail-like speed. We’re talking 1– 3 mph. Torque is much more important than power when it comes to climbing rocky slopes. And remember less is more, especially when it comes to your speed. Controlled throttle and braking is vital to successfully navigating rock.
It should go without saying, but if your vehicle has 8 inches (or 20cm) of ground clearance, you won’t be able to clear a 10-inch (or 25cm) rock. Simple as that. Which is why choosing the best path is most important. Find a line that will keep all four tires on the most even plane, which might not be the lowest. Many 4x4 novices may not realize that the easiest path through difficult rock fields can be found by taking on the tallest rocks.
Use the left foot braking technique, to gently apply throttle up the rock and brake coming off of it.
Avoid sharp and jagged rocks that may puncture your tire’s sidewall.
Airing down will help your tires envelop objects for greater traction.
EQUIPMENT CHECK ROCK PROTECTION
If you’re doing a lot of crawling over rocks and difficult trails, consider adding rock rails and skid plates to particularly sensitive areas underneath your vehicle. Aftermarket bumpers provide additional protection as well.
TYPES OF ROCK
What you’ll encounter will likely vary from loose rock to prehistoric boulders. It’s important to know that loose rock should be treated like any other loose soil condition. Momentum is a must. Steady throttle is crucial in order to maintain the forward momentum needed, especially when driving up a rocky slope.
Boulders, on the other hand, are a completely different beast. This type of expert-level rock crawling can be very challenging, and most stock vehicles are not up to the task. You need a lifted vehicle with large tires, lockers and plenty of ground clearance.
SOLID FRONT AXLE
Place your vehicle’s tires on the highest obstacles to avoid damage to the important components located under your vehicle.
INDEPENDENT FRONT SUSPENSION
In an IFS system, each wheel acts independently. Putting one wheel on an obstacle may not raise the rest of the vehicle like a solid front axle. Be aware of your rear axle (likely not independent) when crossing an obstacle.
WATCH YOUR DIFFERENTIAL
Avoid straddling rocks that are anywhere close to your minimum ground clearance. This could cause damage to your differential or even high-center the vehicle.
NO SHAME IN A SPOTTER
It may be difficult to locate the proper line from behind the steering wheel. A trusted spotter can save you from injuring yourself or causing costly damage to your vehicle.
Hand signals are always better than verbal commands, which can be misunderstood or drowned out by the engine. Make sure you and your spotter have agreed on signals that you’ll both be able to recognize. Someone panicking and waving their arms around like a helicopter will only cause more confusion. Always ignore everyone but the chosen spotter.
While spotting, know the risks associated with being near a moving vehicle. Stand far enough away from the vehicle to avoid being crushed by an unexpected roll or sudden burst of throttle.
SAND
Don’t let the thought of a beach vacation fool you. Sand can be one of the most difficult terrains to navigate. This has a lot to do with the fact that beneath the surface there’s typically even more sand, making traction and flotation difficult to come by.
Driving pristine coastline is every overlander’s dream. But if you get stuck on a beach, you could be the star of the internet’s next fail video when your vehicle is swept out to sea. It happens more than you might think.
Don’t be that person.
PREPARING FOR SAND
The most important aspect of driving on sand is your tire’s flotation. The more tread you have touching the sand, the better. You will need to air down your tires to some extent in order in increase your tire’s footprint. How much depends on your vehicle and the type of sand in question.
All-terrain tires tend to perform better in sand, but wide-profile mud-terrain tires can also work to your advantage and even perform like paddle tires at the correct pressure. While the right tires do matter, there is quite a bit of strategy when it comes to driving in sand. Air pressure, momentum and throttle application are the fundamentals that will ultimately keep you moving.
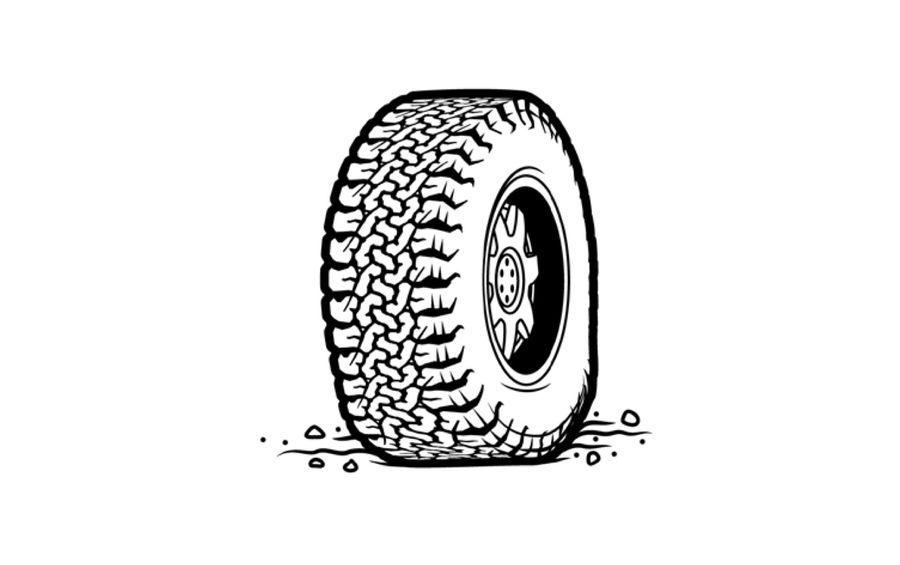
Airing down increases your tire’s footprint, allowing it to “float” ride on top of the sand.
Soft, loose sand robs the power and traction from your 4X4 vehicle. So it’s imperative to keep steady forward momentum to lessen the chance of getting stuck. There are so many variations of sand out there that it’s always a good idea to check out the area by foot. If your feet become completely submerged, imagine how much your half-ton rig will sink. Regardless, if you do plan to drive on sand you should always remember the following:
Once your vehicle is in motion, ride at the highest comfortable gear to maintain momentum.
When you do need to stop, it’s important to park your vehicle in a spot where you can easily gain momentum, such as a slight downhill slope.
Sharp, sudden turns may cause your tires to dig deep into the sand.
If forward progress ceases, DO NOT apply more throttle. This will only worsen the situation by causing your tires to dig down deeper into the sand.
If you lose momentum, try to back up your rig gently. If your tires start to spin, it’s time to get your shovel.
If your vehicle gets stuck, you’ll have to dig out around the wheels. Hub caps, Frisbees or your spotter’s hat can serve as makeshift shovels if you’ve forgotten yours. If there’s water near, wet the sand in front of the tires to provide firmer terrain to grab onto. You can even place your vehicle’s floor mats under the tires for traction.
EQUIPMENT CHECK DUNE FLAG
When driving dunes, make sure your vehicle has a flag and/or whip light to allow drivers on the other side of a dune to know your location.

MUD
There’s an ancient trail proverb that goes “mud maketh man.” But in reality, mud maketh a mess. Don’t get us wrong – it’s fun, sticky and proof you’ve been on the trail. But before you go clogging your local car wash, it’s important to know the challenges associated with mud on the trail.
PREPARING FOR MUD
Rather than trying to prove that you can do it, take a step back, analyze the situation and ask yourself if you really need to do it. If the answer is yes, then it’s time to do a bit of detective work to ensure that your rig is actually going to make it to the other side.
Are there tracks going in? And are there tracks coming out? If there are only tracks going in, then someone didn’t make it, and chances are you won’t either.
You’ll never know how deep it is until you check. Test the depth with a stick, shovel or anything you can get your hands on before entering.
COMMIT TO THE PIT Driving with only two tires in the mud affects the clearance and weight distribution of your vehicle. Go all in or go around.
GETTING TO THE OTHER SIDE
So this is it. You’ve taken the proper precautions, decided you and your vehicle are prepared to make it and are ready to let the mud fly. But in order to avoid a few laughs from onlookers, keep in mind the following:
Lock ‘em if you got ‘em. Engage both lockers and 4WD before entering mud.
Avoid ruts when possible. Driving in existing ruts or tracks will only reduce your vehicle’s ground clearance and increase your chances of getting stuck.
Enter the mud with a good amount of momentum, and use light throttle to avoid wheel spin.
Pick a straight line and commit. You need to live with your decision or live with getting stuck.
DO NOT brake. This will only kill momentum.
If you feel yourself losing traction, turn your steering wheel back and forth quickly, which will add the tire’s cleated sidewall to the traction equation. The sidewalls will act like “paddles” that use the sides of the trench the tire has sunk into for extra traction.
POST-MUD BATH
If you make a mess, you must be prepared to clean it up. Check your differentials, transmission, transfer case and brakes to make sure nothing was displaced after driving though deep, thick mud. After a bit of mudslinging, it’s always important to thoroughly clean your wheels, undercarriage and brakes with a pressure hose. Dried mud can pack into your wheels and brakes, which will cause vibrations and may affect your vehicle’s ability to brake properly when you return to the highway.
EQUIPMENT CHECK MUD-TERRAIN TIRES
Make sure your tires are equipped to take on mud. Many wide-footprint mud-terrain tires excel in these conditions, while average all-terrain tires don’t have the self-cleaning capabilities required to sustain traction and will quickly turn into big mud balls.
Pro
Tip
Did you know that Pam® works for more than just baking cookies? Apply nonstick cooking spray to the undercarriage of your vehicle. This will keep mud from sticking and allow for easier cleanup.
CROSSING STREAMS
It’s not a matter if you’ll need to cross a stream but when. So make sure you’ve taken every single precaution. It’s most important to know your vehicle’s fording limits. For stock vehicles, this may be found in the owner’s manual, but will change on a heavily modified, lifted vehicle.
PREPARING TO CROSS
If you take away one thing from this chapter, make it this: Do not drive across a stream that you wouldn’t attempt to cross on foot. It’s always a good idea to check the depth before you cross, especially in murky, muddy water. Bottom conditions will affect your vehicle as much as water depth, so it’s important to know what kind of surface you’ll be driving on.
Areas of faster moving water will generally be rockier, which can be good for traction but could easily puncture a tire. You won’t be able to see and avoid jagged edges.
Stagnant, slow-moving water is typically muddy and can make it difficult to gain traction.
Water is deepest where it’s calmest.
IS IT SAFE TO CROSS?
BOTTOM OF HEADLIGHTS: Avoid if possible.
IS IT SAFE TO CROSS?
BUMPER DEPTH: Proceed with caution.
IS IT SAFE TO CROSS?
UP TO THE AXLES: You’re probably OK.
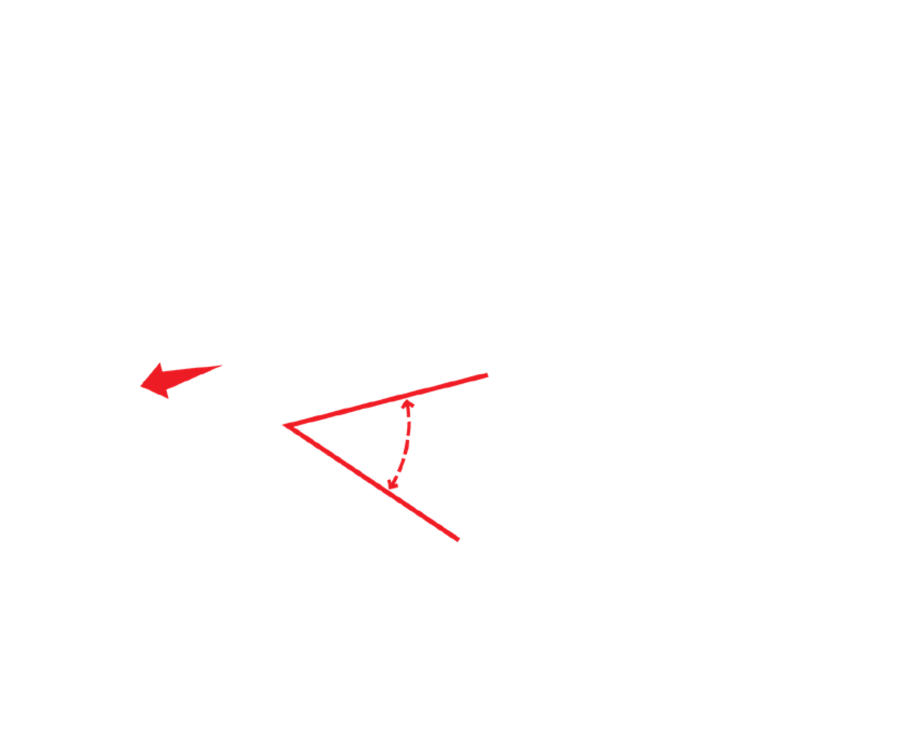
DRIVE DIAGONALLY TO THE CURRENT
Don’t fight the current. You won’t win. In fast-moving water, it’s best to cross at a diagonal to the current. This lessens the amount of surface area for water to push your vehicle downstream.
DRIVING ACROSS
Once you’ve determined the water is safe to cross, practice the following:
Enter the water slowly in order to avoid creating a wave that can splash into your vehicle’s intake.
Use low range and gear. Do not change gears midstream.
Drive at a diagonal into the current.
Keep steady forward momentum while being careful of large objects.
If an engine stalls because of overly deep water or the ignition getting wet, DO NOT restart it.
If you start to lose traction on a soft bottom crossing, quickly turn your wheels left, right, left, right, to reestablish traction.
POST-CROSS
Always inspect your rig after crossing water to make sure no damage has been done to the undercarriage. It’s also a good idea to test your brakes when you return to dry land. You can accelerate the drying process with a few sudden, hard stops to generate some extra heat.
REMEMBER THIS: Crossing deep water is the only time you should unfasten your seat belt. Keep your window open and seat belt unbuckled for easier escape in the event of an emergency.
SNOW AND ICE
Navigating snow can be a lot like navigating mud and other loose conditions – it’s just a helluva lot colder and there’s a lot more of it. Maintaining momentum is crucial. You’ve got to be able to keep your vehicle moving or you’re as good as stuck. But avoid spinning your tires and creating ruts your vehicle is unable to escape.
Sometimes snow is just too deep to navigate. Your vehicle only has so much clearance. If your undercarriage is touching snow, it’s only a matter of time before you won’t be able to budge. Snow can be tricky because it covers ruts, rocks and other obstacles normally seen in the summer months. If you are familiar with the trail, try to avoid any rough spots you remember, but if you are new to the trail, proceed with caution.
Never slam on your brakes, as this will inevitably cause your vehicle to skid. If your vehicle begins to skid, back off the brakes while turning into the slide. Stay calm and do your best not to overcorrect, because this will only make matters worse.

ARE YOUR TIRES WINTER-RATED?
All-terrain tires are much more adept on snowy and icy highways, due to increased siping and the closed tread design. However, in really deep snow, mud-terrain tires become the better option. For all-around snow performance, look for the three-peak mountain snowflake symbol on BFGoodrich® tires, signifying that the tire meets or exceeds the minimum requirements needed to be classified as a winter-rated tire.
3-POINT TURN
Every four-wheeler will reach a time in their career when there is no other choice but to turn around, whether due 2 to a washed-out trail, impassable object or unforeseen act of nature. So you’ll need to be sure you can properly execute a 3-point turn on a narrow trail. In extreme circumstances, this could prevent you from plummeting to an untimely death.
1
Using low range and first gear, pull up to the edge of the trail and reverse back up the hill.
2
Apply the throttle as needed to back up the bank far enough to turn your wheel in the direction you want to go.
3
Drive back onto the trail in the opposite direction.
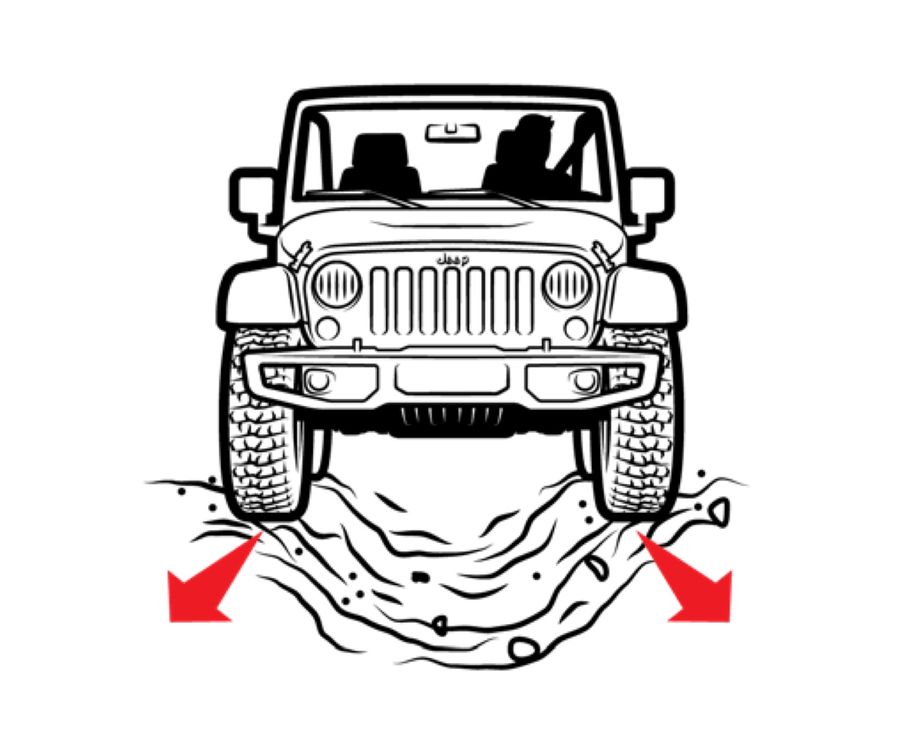
RUTS AND GULLIES
If you wanted level surfaces you’d stick to the highway. But since you’ve made it, we know you’re after adventure. No matter the trail or geographical location, you will encounter numerous ruts and gullies along your journeys. That’s a promise. So make sure you know what you’re doing when you get out there.
LIMITED CLEARANCE
How you approach a rut or gully depends on the level of clearance your vehicle has. If your vehicle has adequate ground clearance, you are able to enter the hole straight on. This method will provide the best traction.
When clearance is a problem, you may need to enter the hole diagonally. This will lessen the clearance needed to clear the hole but can also lessen traction.
Know your vehicle and choose the scenario that best fits the situation.
![]()
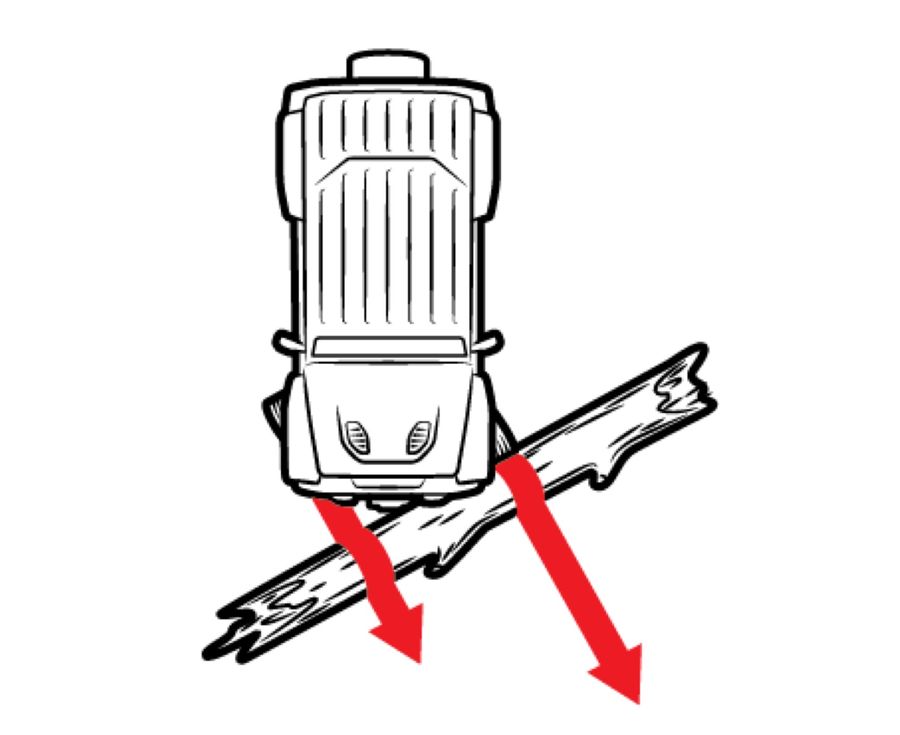
STRADDLING
If your vehicle has the wheel width, it’s best to straddle ruts or gullies when possible. Go slow and do your best not to let one set of wheels slip into the crevice. Straddling will offer a more comfortable drive and keep your vehicle in an upright position to allow a better view of the trail.
OBSTACLES
Hitting the trail will give you the opportunity to see lush forests, natural beauty and some of the most memorable views on Earth. The only problem with the scenic route is there’s always something blocking you. When traversing trails in heavily wooded areas, there’s a good chance you’ll encounter a dead log obstructing your path.
As with other objects, getting over the log will depend on your vehicle’s clearance. But if you don’t have the clearance, you may not need to turn around. There are a few other things you can do to get your vehicle up and over.
Cross the log at an angle, one tire at a time. This will decrease the clearance needed to cross.
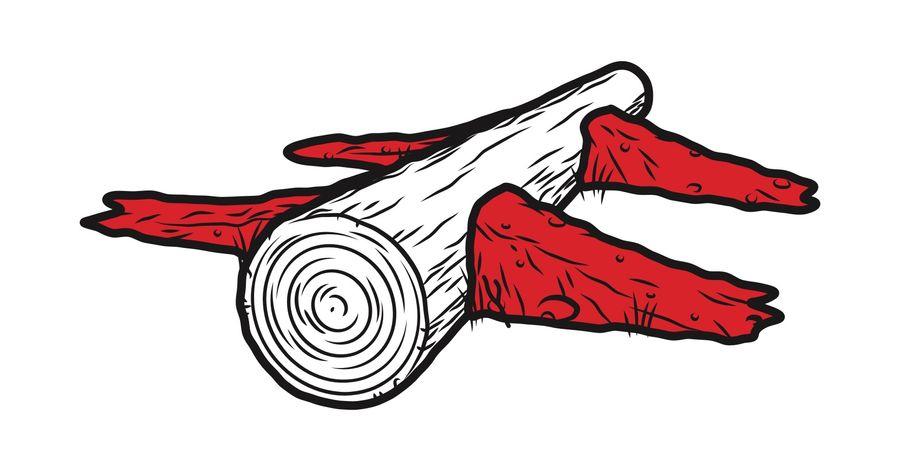
If driving at an angle still won’t get you over, you can build a makeshift ramp with the materials around you, such as small logs, rocks or dirt.

If you are unable to cross an obstacle, you may be able to clear a path for your vehicle. Use your winch to pull things like a fallen tree out of your way.
Something went wrong, please retry later